Blob Paint / Dot Paint Recipes
No Varnish Version
This version is less expensive option excluding the varnish and is popular for schools and those that want to practice.
Supplies Needed:
- Acrylic Paint – Preferred Brands: Liquitex Basics, or Arteza in the tube. Thick paint.
- Mod-Podge Gloss Orange Label
- Any size cups
- Bottles
- Stir Sticks
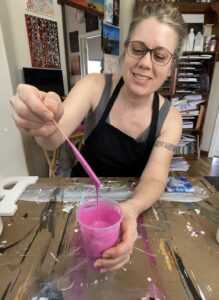
For the paint, fill up the bottom of the cup with one of the preferred paints, and add 2 times that amount in mod-podge. Stir it good for a minimum of two minutes then test a blob. If a lump stays on top and doesn’t smooth out, add more mod podge a little at a time until you get the right consistency. See below for more tips.
Varnish Version (My Go-to!)
- Add Liquitex Gloss or High Gloss Varnish
Follow the no varnish recipe and then add a couple squirts of varnish or up to 25% of the mixture. The more you use, the less height you may get when dried.
Blob Paint Tips
- To varnish or no varnish. If just playing around experimenting and not shipping the art, you don’t need varnish. If you are reselling or shipping, use varnish for extra protection.
- When you mix the paint with Mod Podge, it will change the color of the paint, but don’t fret. Mod Podge dries clear, so it will return to its color once the blobs dry. Example, black will turn grey, but will go back to black once it dries.
- Other paint works besides the preferred paints, but may need to tweak the recipe depending on how thick or thin the paint is.
- Thinner type paints like Decoart, you will need more paint than mod podge.
- Never add water to any blob paint recipe, in my opinion, that is what breaks down the paint recipe and creates cracks. Also never use Floetrol if you want height to your blobs, it is a leveler and will flatten out your blobs.
- If you pick up the paint with your stir stick and it comes off clumpy, you need to thin out the recipe, add more mod-podge a little at a time until the right consistency.
- Mix your paint until silky smooth. You want it thick enough to control and squeeze out of the bottle. If you tilt the bottle and the paint runs out it’s too thin.
- Test a blob before adding the paint to the bottles to make sure any nipple that may form goes away. If it does not go away, add more mod podge a little at a time until you get it right.
- Optional: Store bottles upside down if possible so that the bubbles dissipate to the top, doesn’t always work though. If you need a rack, I sell them. Once you lay down the blobs or dots on the canvas, have a torch handy to get any bubbles out, careful not to torch the paint. If any deep spots occur from torching a bubble, take a little paint on the tip of your dotting tool and fill it in.
- The painting may feel dry to touch 1-2 days after, but let sit for a 4 weeks to fully cure, per the mod podge directions. This is especially important if you are boxing up and shipping the painting. If you are making huge blobs, I would wait several days between layers and let it cure for a week or two longer.
- Even though cured, do not let anything heavy rest on the blobs.
Check out the art supplies I use page for products used.
Have fun! Reach out with any questions.
Blob Paint, Dot Paint Recipe, How-to Tutorial
If the video is not displaying, click here to view on YouTube.